From large motorcycles to moped models, headlights are now always on, even during the daytime. When replacing the bulb=glass bulb, rather than the LED-based headlights that are common in newer models today, there are various commitments and things to do when replacing parts.
Here, we will explain the key points you need to know when replacing headlight bulbs.
- Note that the headlight body is heavier than expected.
- The fixture is supposed to come off at your fingertips.
Note that the headlight body is heavier than expected.
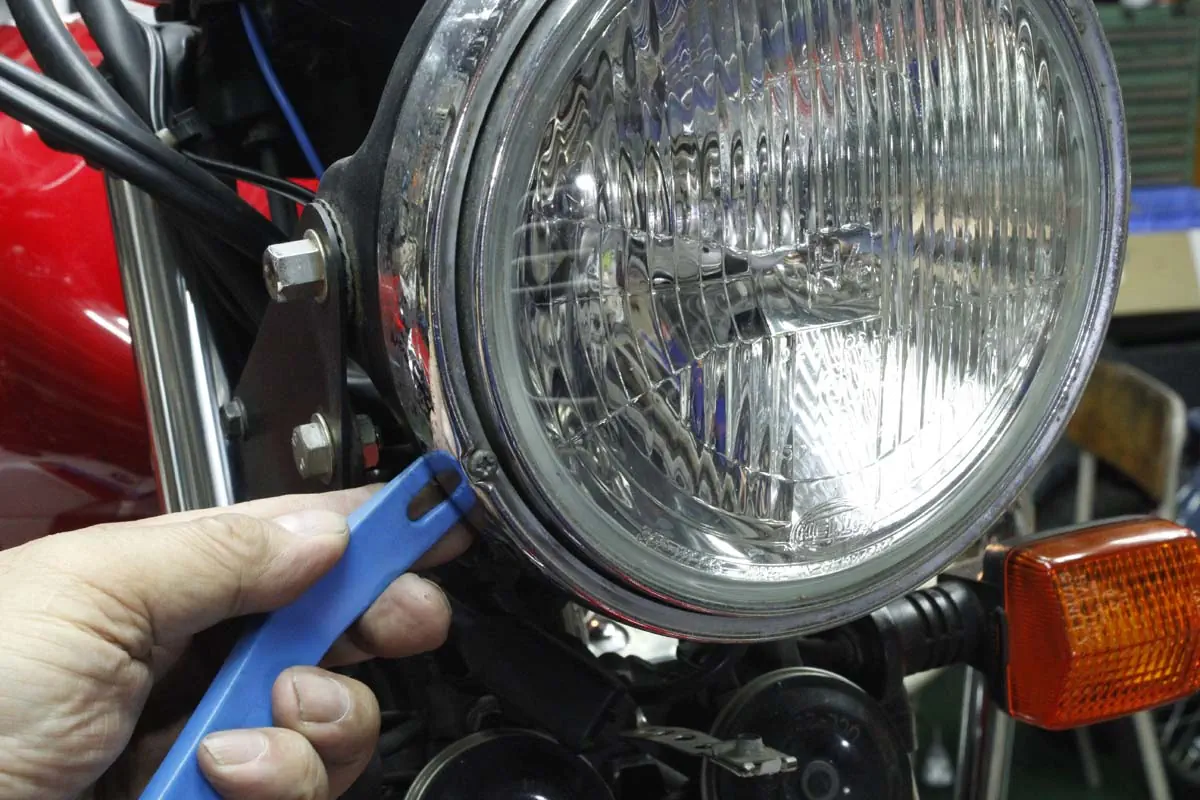
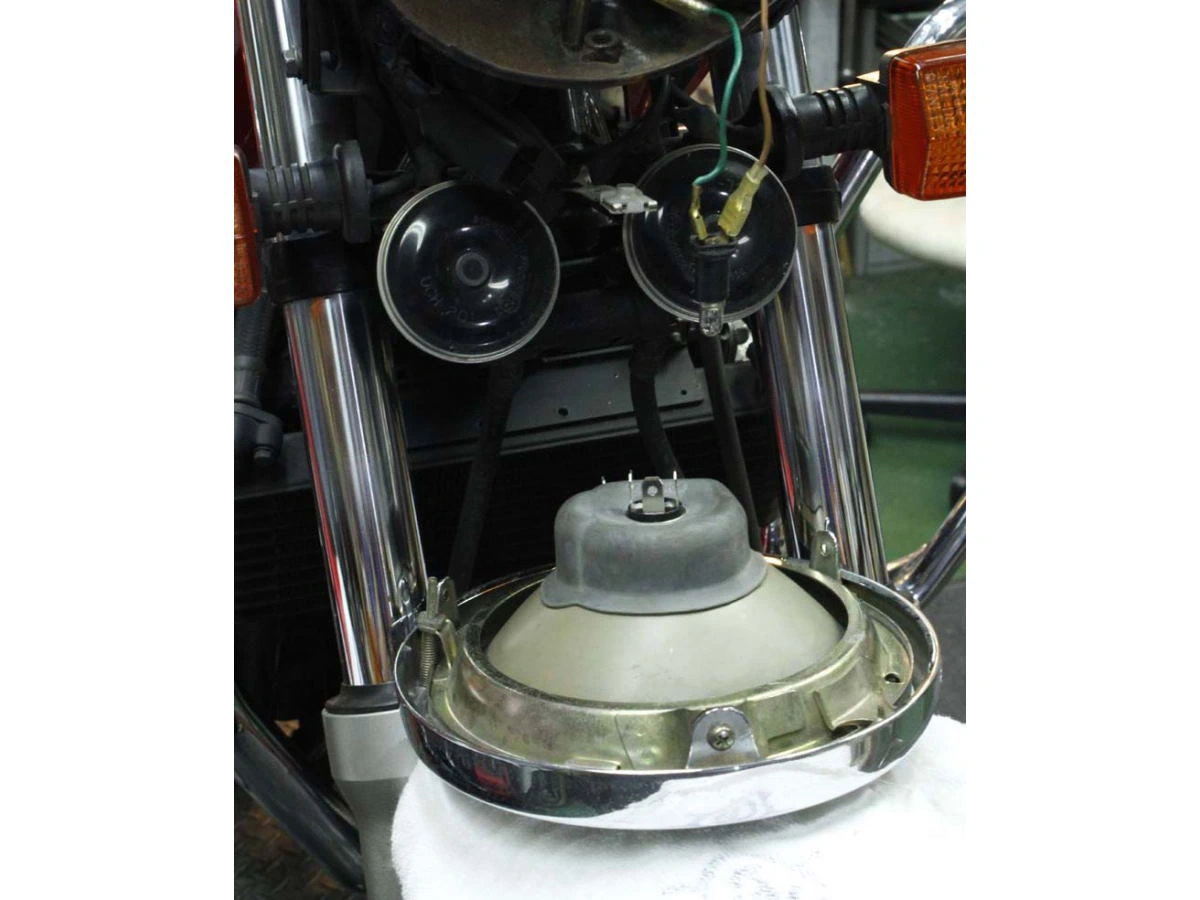
Moped class models have lightweight parts and are easy to remove, but mid-size and larger models have a surprisingly heavy headlight body and rim, and the unit may fall off when removed from the light case. In particular, if the coupler that plugs into the bulb is loose, the unit may fall out. If the light rim is too tight to be removed from the light case, insert a plastic lever into the gap and turn it as if twisting it, which will make it easier to pop off. Place a folded rag on the front fender directly under the headlight and gently hold the removed unit.
The fixture is supposed to come off at your fingertips.
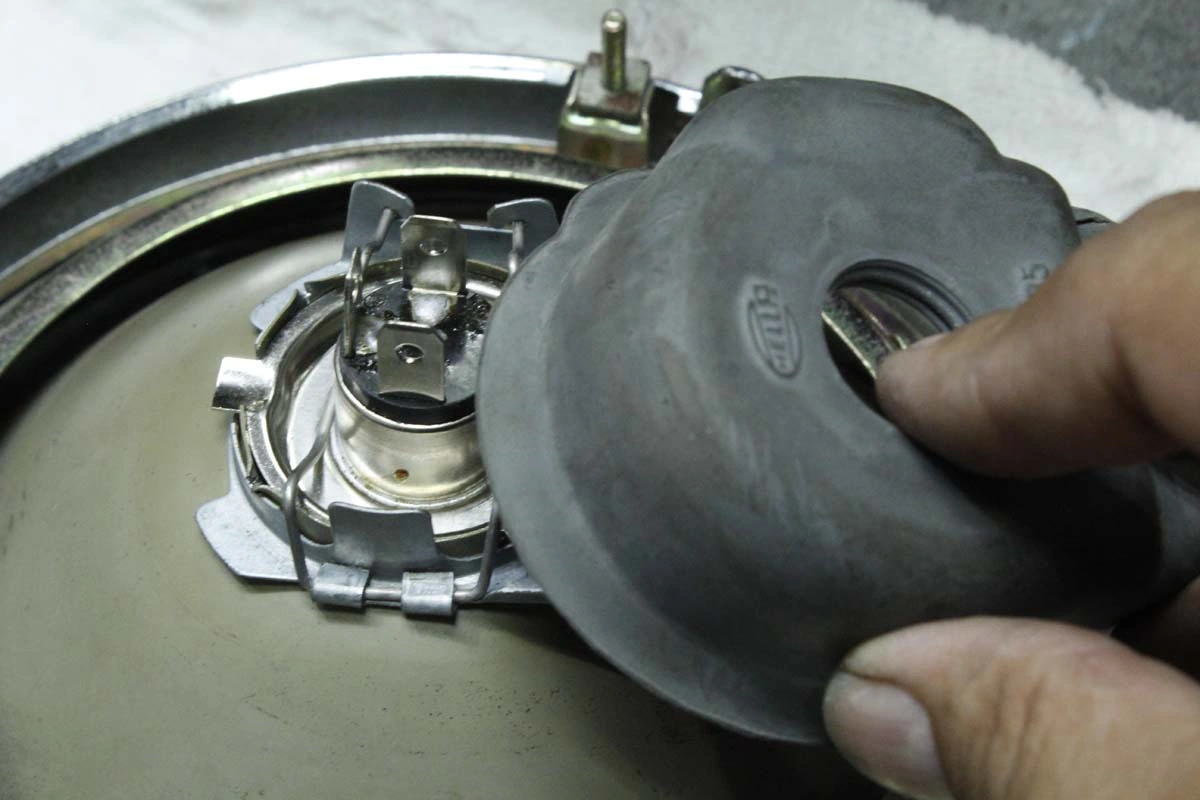
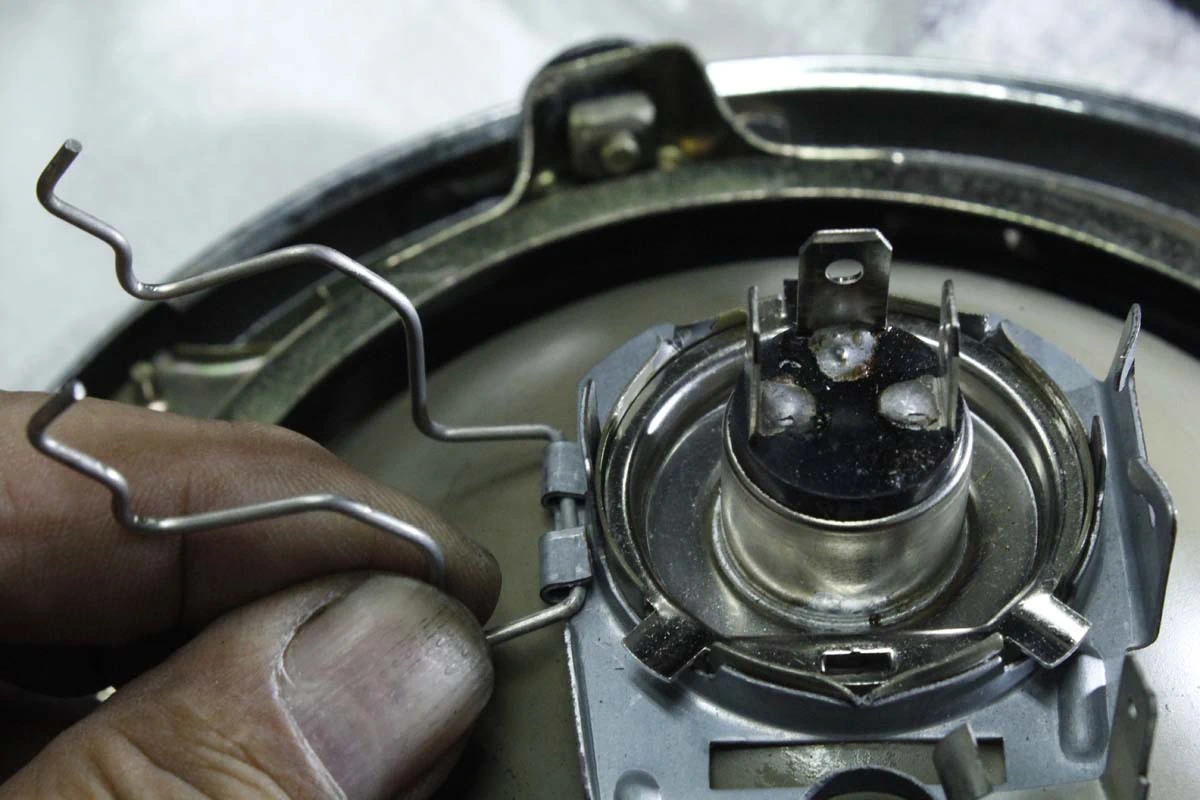
Many old-type valves are removed by twisting the terminal holder fittings (also for moped scooters, etc.), but in the case of H4-type valves, pull off the rubber dust cover to find a wire-like fitting that secures the valve flange, and pull it up while pushing in the hooked part with fingertips to free it. If you cannot remove it by finger force, you can use radio pliers to avoid damaging other parts.